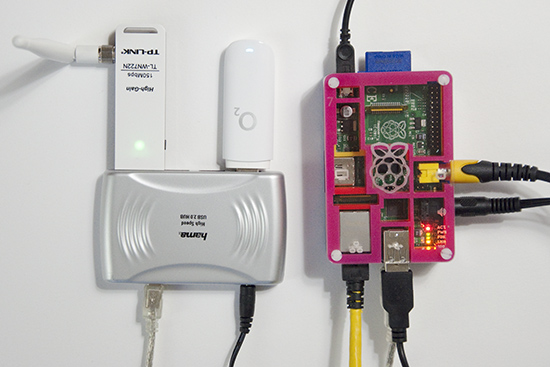
In a previous post, I talked about using the Raspberry Pi as a router. Now I wanted to add a WiFi device, and use the Pi as an access point as well. The Pi has three network interfaces: wlan0 is the newly added WLAN device, eth0 is my LAN, and ppp0 is a USB GSM modem connecting everything to the internet.
The primary reason for all of this is to have an access point for an Android phone. It turns out that an ad-hoc network is not enough - Android connects only to real access points (unless rooted and configured to be less suspicious). So the task now is to set up a Linux access point.
Software-wise, the access point functionality is provided by hostapd, which can be installed on the Pi easily.
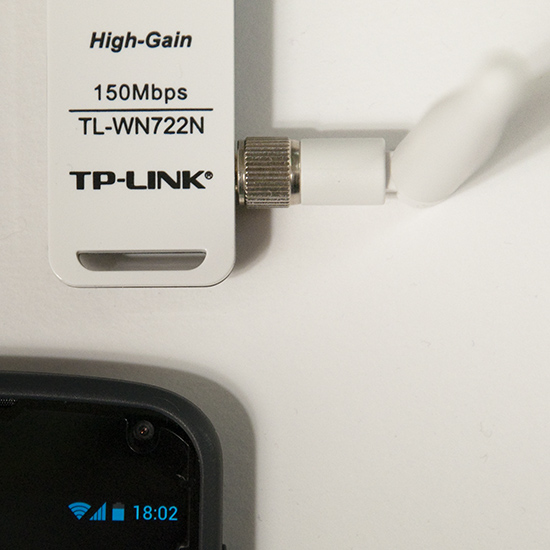
sudo apt-get install hostapdThe hardware part is quite tricky though - not every wlan card works in access point, or managed, mode in Linux. The state of support in the various drivers can be found at linuxwireless.org. Among the USB WiFi sticks, ath9k_htc seems well supported. I ended up buying a TL-WN722N, since it is supported by the ath9k_htc drier, and the external antenna looks efficient. It has worked very well so far, and is in daily use. Below, I describe the steps required for setting up everything. I am using Raspbian, but most of the things should work on any distribution.
The steps
Set up a DHCP server. Edit /etc/dhcp/dhcpd.conf and add the following lines.
subnet 10.10.0.0 netmask 255.255.255.0 {If you already have an entry for DHCP on another subnet on another interface, make sure that the old subnet declaration also specifies for which interface it applies. Next, execute the following commands in a terminal, as root.
range 10.10.0.25 10.10.0.50;
option domain-name-servers 8.8.4.4;
option routers 10.10.0.1;
interface wlan0;
}
ifconfig wlan0 10.10.0.1 #bring up the interfaceReplace ppp0 on the last line by the interface connected to the internet. For me ppp0 is a GSM modem.
/etc/init.d/isc-dhcp-server restart #restart the DHCP server
echo "1" > /proc/sys/net/ipv4/ip_forward #turn on IP forwarding
iptables -t nat -A POSTROUTING -o ppp0 -j MASQUERADE #add a routing rule.
Edit /etc/hostapd/hostapd.conf . Add these lines (as a starting point):
interface=wlan0
driver=nl80211
ssid=YOUR_STATION
hw_mode=g
channel=11
wpa=1
wpa_passphrase=SECRETPASSWORD
wpa_key_mgmt=WPA-PSK
wpa_pairwise=TKIP CCMP
wpa_ptk_rekey=600
macaddr_acl=0
Next, start the access point by running hostapd.
hostapd -d /etc/hostapd/hostapd.conf
-d is for debugging output. -dd shows even more. Can be useful while setting up.
Now you should be able to connect to your new access point! Note that when hostapd quits, wlan0 looses it's IP address. So the IP must be set each time before hostapd is run.

If everything works with this setup, it is convenient to automate the startup procedure, so that the access point is enabled at each boot.
To bring up wlan0 at boot, add the following to /etc/network/interfaces
auto wlan0To start hostapd automatically, add the command to /etc/rc.local:
iface wlan0 inet static
address 10.10.0.1
netmask 255.255.255.0
hostapd -B /etc/hostapd/hostapd.conf-B is for running in the background, as a daemon. Messages are logged in /var/log/syslog.
For setting up the IP forwarding stuff permanently, see my previous router post, and this nice guide.
So far I am very pleased with this setup. The only drawback is that the LAN on eth0 and the wireless network are separate and isolated from each other. Perhaps it's possible to construct a network bridge between the LAN and the WLAN interface. Then the two networks would appear as one, but this I leave for the next hacking session.
Add randomness!
Finally a note about a puzzling message from hostapd. When run with the flag -dd, hostapd works, but outputs
Add randomness: count=1 entropy=0
Add randomness: count=2 entropy=1
Add randomness: count=3 entropy=2
and so on, with a new line every second or so. I thought this had to do with /dev/random running out of random bits, but this is not the case.
Reading the source code of hostapd (version 1.0, since this is what I have on the Pi), this turns out to be a normal and harmless debugging message. Hostapd keeps an internal pool of random bits (for encryption), in addition to the random numbers it reads from /dev/random. In different places in the program, random (or at least unpredictable) data is mixed into this pool. For example the signal strength of each received packet is used in this way. The "Add randomness" message is printed each time data is added to the pool. This is done in the function
random_add_randomness (const void *buf, size_t len)in the file hostapd-1.0/src/crypto/random.c. So, in summary, the message can safely be ignored, and goes away if one runs hostapd without the -dd flag.
However, on a small system like the Pi, there is a risk of depleting /dev/random, especially just after a boot. I observed these messages from hostapd:
random: Got 18/20 bytes from /dev/randomAt this point I installed the program haveged,
random: Only 18/20 bytes of strong random data available from /dev/random
sudo apt-get install havegedHaveged is a program that helps with providing randomness or entropy, which it collects faster than the kernel does by default. I have not seen the message since then.


Nice post. I am just about building a router myself, if the board would finally arrive. :(
ReplyDeleteThe frustrating part for me was to find that a WiFi stick I already had did not work in access point mode. Just get a network stick/card with good Linux support and the rest will be easy :) Your board is something PC-based, right?
DeleteIt'S A Clean Machine: Wifi Access Point With Raspberry Pi >>>>> Download Now
Delete>>>>> Download Full
It'S A Clean Machine: Wifi Access Point With Raspberry Pi >>>>> Download LINK
>>>>> Download Now
It'S A Clean Machine: Wifi Access Point With Raspberry Pi >>>>> Download Full
>>>>> Download LINK Gs
ok.... so can I SSH into mine raspberry pi occidentalis if I set it up as access point but I didn't bridge the Ethernet connection
ReplyDeleteI don mind having no internet on mine raspberry pi since I will be only using it as a controller for mine project?
kk I have set up mine raspberry pi as a wifi access point without the bridging and I got an ip address form it but I can't SSH into it since putty keep giving me error "connection refused"
ReplyDeleteFirst, just to ssh to the raspberry, you don't have to make it an access point. ssh works also when the pi is connected as a client to a wireless router. But if you have the access point set up already, it's fine of course.
DeleteThings to try:
1) Can you ping the Pi from the other computer?
2) Is sshd running on the Pi?
3) Do you see any messages in the logs on the Pi related to ssh and why it doesn't accept the connection?
/var/log/auth.log is one place to look.
I want SSH into raspberry pi in wifi hotspot where I don have the password will it still work ?
ReplyDeleteThis information is very useful for me. Thank you. For more details Click Here
ReplyDeletethank u for sharing this post
ReplyDeletewireless solutions
wireless survey
Your blogs further more each else volume is so entertaining further serviceable It appoints me befall retreat encore. I will instantly grab your feed to stay informed of any updates. best router for multiple devices
ReplyDeleteGreat post, thanks for sharing!
ReplyDeleteHương Lâm với website Huonglam.vn chuyên cung cấp máy photocopy toshiba cũ và dòng máy máy photocopy ricoh cũ uy tín, giá rẻ nhất TP.HCM
McAfee Activate Product Key
ReplyDeleteNorton setup with Product key
Thanks for sharing such an great article it's really helpful for me.
ReplyDeletenorton phone number
norton support phone number
norton contact phone number
norton security contact number
Thanks you for sharing.
ReplyDeleteVarious Problem Of Norton Antivirus With Solution
ReplyDeleteHow To Resolve malwarebytes not opening windows 10
How To Resolve When Yahoo Mail not Receiving Mails
How To Get our HP Printer Back Online
Repair My Phone Today is a leading Cell Phone Repair Store in Oxford providing the best repairing/replacement services for the screen, a battery of smartphones, laptops, tablets, smartwatches, etc. We deal in Apple iPhone, Samsung Galaxy, Huawei phones, Nokia Smartphones & many others
ReplyDeletePhone Screen Repair
iPhone X Screen Repair
iPhone XR screen repair
iPhone 7 screen repair
iPhone 7 plus screen repair
iphone 8 screen repairbvfr5
iphone 8 plus screen repair
It'S A Clean Machine: Wifi Access Point With Raspberry Pi >>>>> Download Now
ReplyDelete>>>>> Download Full
It'S A Clean Machine: Wifi Access Point With Raspberry Pi >>>>> Download LINK
>>>>> Download Now
It'S A Clean Machine: Wifi Access Point With Raspberry Pi >>>>> Download Full
>>>>> Download LINK
Hi Everyone
ReplyDeleteSteves Mini Skip Hire specializes in Mini Skip Hire in Winslow and Buckinghamshire.
Skip Hire Winslow
Mini Skips Milton Keynes
Thanks for sharing
Thanks for great tips to get more and more knowledge about commercial wifi.
ReplyDeleteThis comment has been removed by the author.
ReplyDeleteWow, this WiFi access point is a game-changer! Lightning-fast speeds and rock-solid connection. Easy setup, and it's been a game-changer for my home office. Thanks for the recommendation! wifi access point
ReplyDeleteNice Post
ReplyDelete